
A sharp tick on a cold start is worth noting, especially if it seems to come from the side of the engine. The useful next question is where the exhaust is escaping. It could be the gasket at the cylinder head, a crack in the manifold, or the joint that connects the manifold to the front pipe. Those repairs can sound alike from the driver’s seat. Use the clues below to tell a shop where to start, then ask it to confirm the source before you buy parts.
Start with the location. A soot trail along the head flange points to a different inspection than a crack in the casting or soot around the flex pipe.
If exhaust fumes enter the cabin, pull over safely, shut off the engine, and get everyone into fresh air. Arrange a tow or inspection before driving again. Carbon monoxide has no odor. If anyone feels ill after possible exposure, seek emergency help.
Common Exhaust Manifold Leak Symptoms
Pay attention to when the noise starts, whether it changes as the engine warms, and where it seems loudest. That gives the shop a condition it can try to reproduce. A description such as “a tick on the right side for the first minute after a cold start” is more helpful than “the engine sounds loud.”
| What you notice | Where to look first | What needs confirmation |
|---|---|---|
| A sharp tick or puff near the engine on a cold start. | Head-to-manifold seam, nearby fasteners, and manifold body. | The noise can change with temperature. A technician needs to locate escaping gas or distinguish it from other engine noise. |
| A black soot trail around a flange or weld. | The point where the trail begins, with the exhaust cold. | Whether that point is actively leaking or the deposit is left over from an earlier problem. |
| A louder exhaust note farther down the front of the car. | Manifold outlet, front pipe, and flex section where fitted. | Which joint or pipe is leaking. Sound can carry through the engine bay and along the exhaust. |
| A check-engine light or a change in fuel economy. | Stored codes and the exhaust around the relevant sensors. | A leak near a sensor can affect readings. Other faults can produce similar symptoms, so the code needs diagnosis. |
Write down any recent work. A noise that started after a front pipe was replaced gives the shop a reason to check that connection early. If the noise only happens on the first start of the day, tell the shop before the car warms up on the way there. It may need time to reproduce the symptom.
Where an Exhaust Manifold Leak Can Occur
Follow the exhaust from the cylinder head toward the front pipe. The assembly may have shields that hide some of the joints. The layout also varies by vehicle, so use these locations as a guide to the area the shop needs to inspect.
At the cylinder head
The manifold flange seals at the exhaust ports. A gasket problem, a broken stud, or a distorted flange can open a path along that seam.
Through the manifold body
A cast manifold can crack, and a fabricated manifold can leak at a tube or weld. Check for a trail or a confirmed leak through the metal away from the mounting seam.
At the outlet or farther down
Check the outlet gasket, fasteners, front-pipe connection, and the flex section if fitted. The repair may involve the downstream part even when the noise seems to come from under the hood.
A leak at the outlet may sit only a short distance from the manifold itself. When someone says the car has a “manifold leak,” ask which surface or part they mean. That distinction matters when ordering a cylinder-head gasket, an outlet seal, or a replacement manifold.
Exhaust Manifold Gasket Leak vs. a Cracked Manifold
An exhaust manifold gasket leak and a crack can both make a ticking sound. Follow the evidence to the exact location. If the gas comes through the seam between the head and the manifold, the next check is why that seam opened. If it comes through the body, the next check is whether the assembly can be repaired or needs replacement.
| Confirmed leak location | What to inspect before choosing parts | Repair direction |
|---|---|---|
| At the head flange, with sound mating faces and usable hardware. | Check the gasket condition and follow the service procedure for both surfaces. | Use the correct head-to-manifold gasket and any hardware required for the job. |
| At the head flange beside a broken stud or a loose fastener. | Check the threads, remaining fasteners, and flange condition. | Restore the clamping arrangement and renew the seal as specified. |
| At a seam with a flange that is outside the service flatness limit. | Check the mating surface on the head and the options for the manifold. | Resolve the sealing-surface problem before fitting a new gasket. |
| Through a crack, damaged tube, or weld in the manifold body. | Confirm the source and whether a suitable repair is available for that part. | Evaluate manifold repair or replacement. |
| At the outlet connection or the flex pipe. | Check the exact joint, its alignment, and nearby tubing. | Repair the outlet seal, hardware, or affected pipe section. |
Example. A cold tick comes from near the engine and the shop finds a soot trail beside a missing stud. If testing confirms gas escaping at that seam, inspect the mounting surfaces and restore the fastener before choosing the gasket. A separate leak through the manifold body would lead to a different repair.
Once a leaking joint has been opened, the condition of the parts matters more than the sound you heard. Ask to see the failed area and the part the shop intends to replace. If the shop has found more than one opening, ask it to identify each one on the estimate so the repair can cover them together.
How a Technician Confirms the Leak Source
A technician starts with the conditions you noticed. They can inspect the flange and fasteners, look for soot or cracks, and check nearby joints. A shield can block the view of a leak, so a clean area visible from above is only part of the inspection.
- Reproduce the symptom. Tell the shop if it happens during cold start, after warm-up, or under load. A cold-only symptom is easier to assess if the shop can check it before the engine warms.
- Locate the escape point. The shop can use a smoke test or another method appropriate to the vehicle to locate a small leak. Ask where the result points and whether the outlet and downstream joints were checked.
- Check related faults. If a warning light is on, the shop can read the codes and examine sensor readings in the context of the leak location. Those readings can guide the inspection.
- Verify after the repair. Ask the shop to recheck the repaired area and repeat the condition that produced the original symptom. A repair for a cold-start tick is easiest to judge when the vehicle is cold again.
Keep the original symptom and the confirmed source together on the work order. For example, record “cold-start tick, gas escaping at the manifold outlet joint” instead of just “exhaust noise.” If the noise persists after the joint seals, that record gives the shop a starting point for looking for a second source.
What to Replace Once the Leak Is Confirmed
For a confirmed joint leak, identify the seal, mating surfaces, and hardware the repair will address. If the manifold body is cracked or the flange cannot be brought back within the service requirements, compare replacement assemblies by engine and connection layout. Confirm the head flange, outlet, and any sensor provisions before ordering.
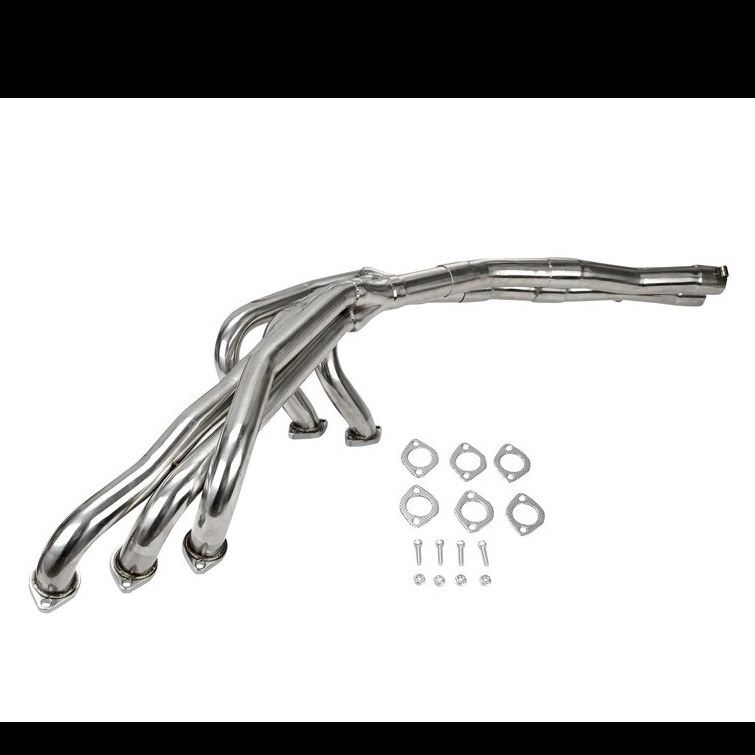
BMW E30 inline-six
For a confirmed manifold replacement, compare Yueding’s BMW E30 stainless manifold with the exact engine and front-pipe layout on the car. Check the engine code if the car has been swapped or modified. The same chassis name can appear on cars with different exhaust connections.
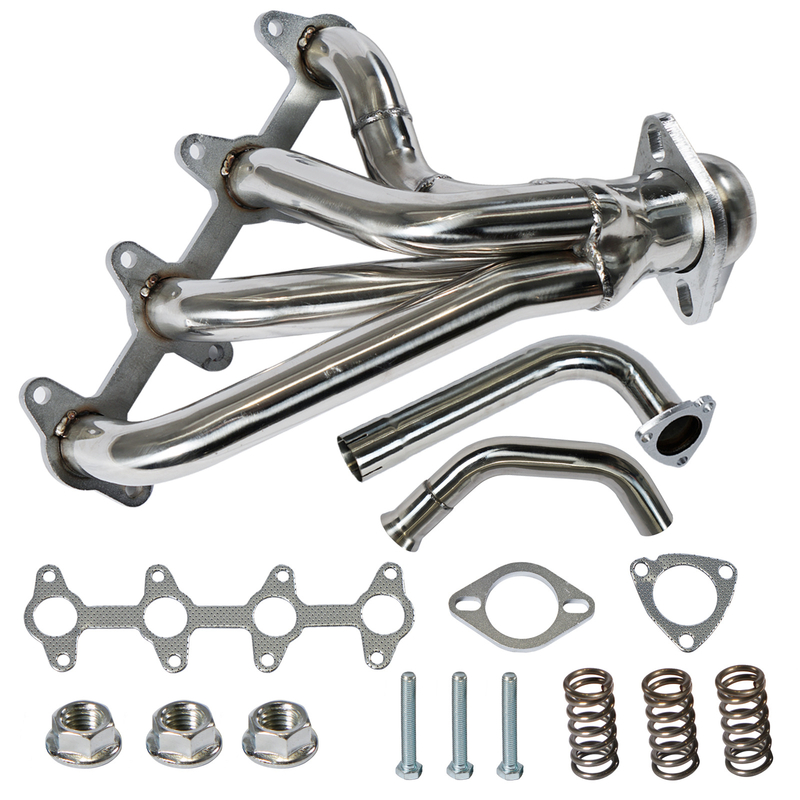
GMC Sonoma and Chevrolet S10
The GMC Sonoma replacement manifold listing covers 1994–2004 Sonoma and S10 applications, with separate 2.2L and 4.3L variants. Send the engine and drivetrain details and compare the original part or OE reference before ordering a specific variant.
For either vehicle, a leak at the outlet gasket or front pipe can change the scope of the job. Ask whether the quote includes the head-to-manifold gasket, outlet seal, fasteners, or downstream pieces needed for the confirmed repair. Check the part list against the leak location so the estimate addresses the part that failed.
When to Stop Driving and Arrange an Inspection
Exhaust odor inside the vehicle calls for stopping safely and arranging inspection before continuing. A noise or visible soot outside the cabin still warrants prompt diagnosis. The shop needs the location and severity of the leak to advise on the repair and how to get the vehicle there.
What to tell the shop
Give the vehicle and engine, where the noise seems loudest, when it starts, whether it changes as the engine warms, and any recent exhaust work. Mention any warning lights or cabin odor. If you already have a photo of soot on a cool, accessible part, include it and identify where it was taken.
Use the confirmed leak location to decide what to order. A joint at the head can need a gasket and fasteners. A crack through the body can lead to a replacement manifold, while a leak at the outlet may require work on the adjoining pipe. If you’re ordering a manifold from Yueding, give the engine and current exhaust connections along with the part reference. That makes it easier to quote the right assembly and to check that the rest of the repair is covered.
Frequently Asked Questions
Which exhaust manifold leak symptoms should I report first?
Report any fumes inside the cabin first. Then tell the shop when the noise occurs, where it is loudest, and whether there is soot or a warning light. Those details help it reproduce the problem.
Why does the tick sometimes get quieter after warm-up?
Heating can change the shape of a gap as parts expand. Tell the shop if the noise fades with temperature so it can include a cold check.
Can a check-engine code identify the failed exhaust part?
A code identifies a condition that needs diagnosis. If a leak is suspected, check where gas is escaping and how that location relates to the sensor readings before replacing parts.
What should I ask for if the same leak comes back?
Ask the shop to confirm whether the leak is at the same point and check the mating surfaces, hardware, and pipe alignment. Have it compare the new findings with the original repair before repeating the work.


