
A header tube runs close to a wiring loom, and there is barely enough space to reach the fasteners. Wrapping the tube may help reduce the heat it gives off toward the loom, but it also makes the pipe harder to inspect. That is the practical trade-off behind most exhaust wrap pros and cons. Start by finding the part you want to protect and the section of pipe heating it. Then compare the space for a wrap or shield, how often you need to reach the pipe, and what the exhaust manufacturer allows.
Quick answer Exhaust header wrap is woven insulation fitted directly around suitable exhaust tubing. It follows bends closely. Before choosing it, check the pipe’s condition, the remaining clearance, and how you will inspect the covered section.
What Is Exhaust Heat Wrap and Where Is It Used?
Exhaust heat wrap comes in a roll. It winds around a pipe in overlapping turns and is secured at the ends. The layer slows heat transfer from the covered section to its surroundings. On an exhaust header, it can follow individual primary tubes where a rigid shield would need a more complex shape.
Find the section causing the problem
On a header, look at the runners from the cylinder head to the collector. On a manifold or front pipe, check the portion nearest the component you want to protect. On a motorcycle, the concern may be a front pipe close to the frame or rider area. Choose the section based on the layout and the parts the exhaust manufacturer permits you to cover.
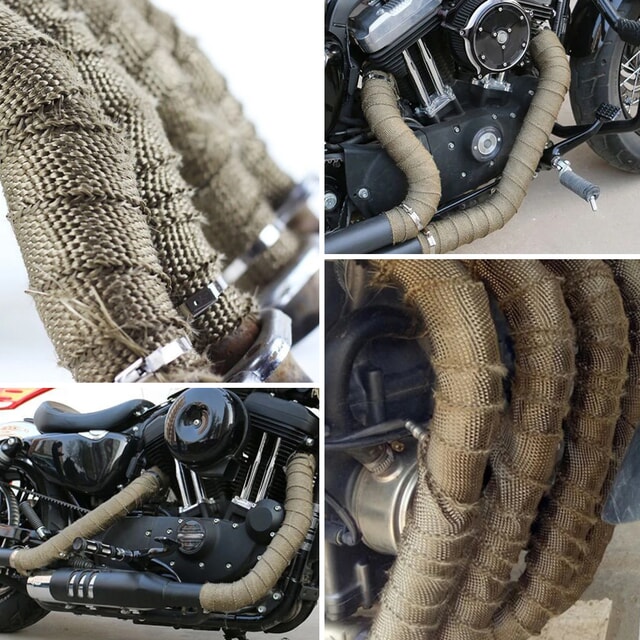
Keep sealing faces, fasteners and sensor fittings accessible. For a catalytic converter, flex joint or coated header, check the component maker’s instructions before covering it. The wrap’s heat rating describes the material. The pipe or component underneath has its own limits.
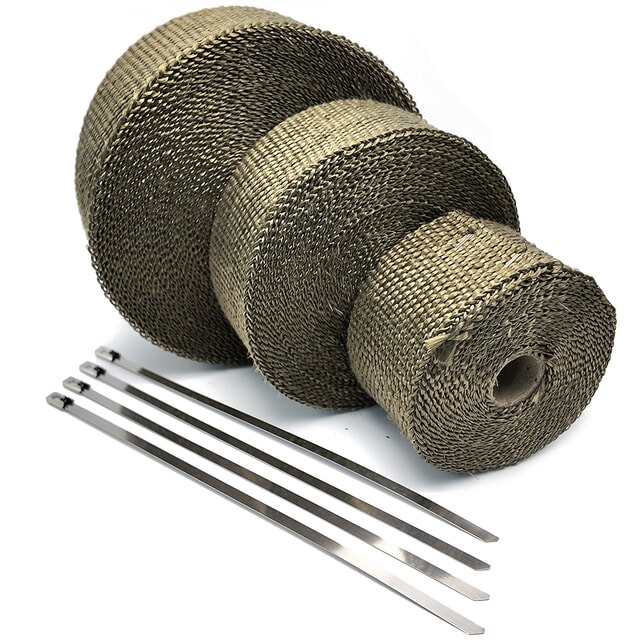
Yueding supplies exhaust heat wrap in fiberglass and basalt, with width and roll length selected for the job. Rolls can be supplied on their own or as kits with stainless steel ties. Confirm the material and finish as separate details when ordering. A color or finish name alone gives you little information about the fiber underneath.
Exhaust Wrap Pros and Cons
Wrap makes the strongest case when a particular pipe section is the source of unwanted heat and the insulation fits in the space available. A curved runner close to a bracket is a different problem from a hot floor above a long exhaust section. Consider what you need to protect and how the vehicle will be maintained.
| What wrap can do | What you give up | What to check |
|---|---|---|
| Reduce heat transfer from the covered pipe to nearby parts. | Insulation changes how the pipe loses heat and can raise metal temperature beneath it. | Whether the exhaust material and finish are suitable for wrapping. |
| Follow bends and irregular routing closely. | Overlaps and tie heads take up space around the tube. | Clearance at the tightest bend and around moving parts. |
| Cover a short section without a separate shield bracket. | The covered metal and welds become harder to inspect. | Which joints need regular access and how the wrap can be removed for service. |
| Provide continuous coverage around a selected tube. | Moisture, road dirt or leaking fluid can collect in the wrap. | How often the area gets wet and whether it can be inspected and cleaned. |
Inspect the pipe before committing to wrap. Covering a rusty seam makes it harder to see whether the damage progresses. If there is a leak or fluid contamination, address the source before adding insulation. In an area that gets soaked regularly, the ability to remove a shield and inspect the pipe may matter more than the close fit of the wrap.
For a purchase specification, ask how the selected material is rated in direct contact with a hot surface and whether the rating applies to continuous exposure or a short peak. Keep those conditions with the quote, particularly if two products use similar descriptions. If your goal is lower heat at a nearby component, evaluate the temperature at that component under comparable operating conditions.
Exhaust Wrap vs. Heat Shields and Coatings
Picture the same hot pipe next to a single vulnerable part. You can cover the pipe, place a barrier between the two, or specify a suitable coating for the pipe itself. How much room you have and how often you need to reach the pipe will help narrow the choice.
| Option | Where it fits | Service and installation |
|---|---|---|
| Exhaust wrap | Approved tube sections with curves or irregular routing. | Needs room for the band and ties. Inspecting the covered metal can require removing the wrap. |
| Heat shield | A specific wire, panel or other component that needs a barrier from the pipe. | Needs suitable mounting and the intended air gap. A removable design can keep the pipe accessible. |
| Thermal coating | A pipe or header being prepared for a compatible coating process. | Requires appropriate surface preparation and application. Confirm the coating’s limits and repair process. |
Measure the smallest gap before choosing a solution. A shield may need more room at its mounting points, while wrap adds material all the way around the tube. A tight gap on one side can make either choice unsuitable. Check whether an existing shield is missing or damaged and whether replacing it would address the original problem.
How Much Header Wrap Do You Need?
Measure the outside diameter and the length of each section you intend to cover. Follow the pipe along the bends when measuring length. Measure each primary separately if its diameter or route differs. Use the actual band width and the overlap specified for the wrap when estimating how far each turn will advance.
For a straight section Estimate the advance per turn as the band width minus the overlap. Divide the covered length by that advance and round up for a planning estimate. Each turn uses roughly the pipe circumference, with a little extra for the spiral path.
Worked estimate for one straight tube
| Input or step | Illustrative value |
|---|---|
| Pipe outside diameter | 50 mm |
| Length to cover | 500 mm |
| Band and assumed overlap | 50 mm band, 25% overlap |
| Estimated advance | 50 mm − 12.5 mm = 37.5 mm per turn |
| Estimated number of turns | 500 ÷ 37.5, rounded up to 14 |
| Planning length | About 2.3 m before allowance for the ends or trimming |
In this example, a turn travels around about 157 mm of circumference and advances about 37.5 mm along the pipe. Allowing for the diagonal path gives about 161 mm per turn. This estimate uses an assumed pipe, band width and overlap. For a real header, plan separate cuts for the primaries and allow for bends, changes in diameter, starting and finishing ends, and trimming.
Check the cut lengths against the roll
Two straight sections like the example need roughly 4.6 m before extra allowances. If you are considering a 5 m roll, that leaves only about 0.4 m for both sections combined. Check the individual cuts before ordering. A partial roll can have enough material in total across several leftovers but still leave no single piece long enough for a runner.
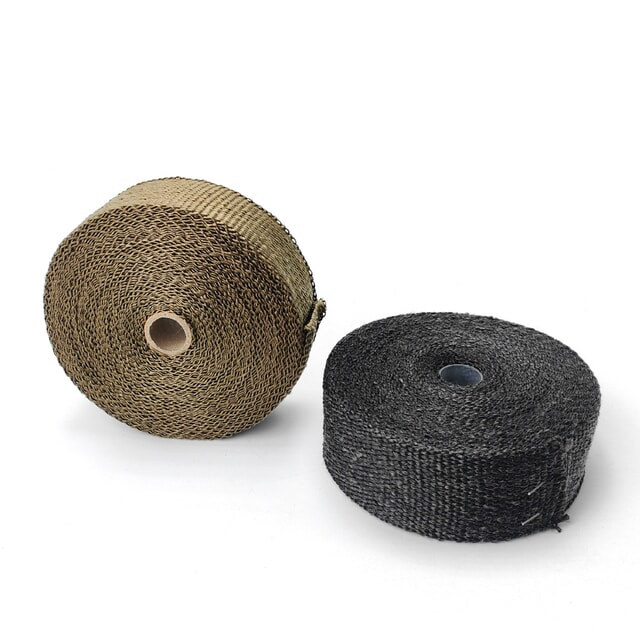
When ordering kits for several vehicles, count the runs that will be wrapped separately. Four individual primaries and a separate collector section have five sets of start and finish points. Use that layout to check tie quantity and size alongside the roll length.
How to Install and Inspect Header Wrap
Start with a cold exhaust. Lay out the sections and tie positions before cutting, especially where the runners come close together. Follow the instructions for the selected wrap and the exhaust part for any wetting, overlap or first-use procedure. Wear the handling protection specified for the material.
- Inspect and clean the pipe. Check seams and joints for leaks, damage, or contamination. Keep the surfaces and fasteners you need for assembly accessible.
- Anchor the first turn. Use the specified fastener and check that the tie head will clear nearby parts. Plan where the last turn will end before you start winding.
- Follow the pipe with even coverage. Keep the required overlap as the wrap goes around the tube. At bends, check for exposed gaps or bunched layers and follow the product guidance for that shape.
- Secure the finish and check clearances. Confirm both ends are held and that the wrap and hardware clear adjacent parts. Check access to sensors, joints and fasteners before refitting any shields.
Inspect the wrap after initial use
Once the exhaust has cooled, look for loose ends, ties that have shifted, and marks where the wrap touches a bracket or nearby pipe. Look for fluid stains as well. If the material has moved, check the cause and the condition of the pipe before replacing the wrap or changing the fastening points.
For repeat jobs, record the cut lengths and which tie positions worked. The next installer can then prepare the pieces without guessing how much was lost at bends or around the collector.
Choose the barrier for the space you have
If a sound pipe needs insulation around a short, curved section and the exhaust maker permits wrapping, check that the finished thickness and ties will fit. If you need regular access to the pipe or the heat is aimed at one component, compare a removable shield. Once the layout is settled, give Yueding the tube diameters, lengths and intended application when specifying wrap. Those details let you choose a width and roll length around the cuts you will actually make and determine which fixing hardware the job needs.
FAQs: Materials, Service Life and Replacement
Which exhaust wrap pros and cons matter most on a vehicle used in the rain?
Consider how often the wrap will stay wet and how easily you can inspect the metal beneath it. If frequent access is a priority, compare a removable shield in the area you need to protect.
How do I choose between fiberglass and basalt wrap?
Compare the direct-contact temperature limits and installation instructions for the exact product. Then check the width, finish and how it will fit around the tightest bends.
Does header wrap need to be soaked?
Follow the instructions for the exact wrap. Some materials can be lightly wetted to help them follow bends. Other weaves and finishes are installed dry or have limits on wetting.
Can I reuse wrap after removing a header?
Check the product instructions and condition of the removed material. If heat cycling has made the wrap brittle, or if it frays or no longer holds its shape, plan to use a fresh piece.
When should I replace exhaust heat wrap?
Inspect it for loose sections, exposed pipe, damaged ties and contamination. Use the condition of the wrap and pipe to decide when to replace it. Correct any leak or rubbing point before covering the section again.


