
How Should You Replace an Exhaust Flex Pipe to Reduce Leakage and Rework?
Replacing an exhaust flex pipe may look like a routine repair job: remove the damaged section and install a new flexible connector. In real repair, replacement, replenishment, and mixed-size order situations, however, leakage, noise, rework, and customer complaints are not always caused by the product itself.
If the size is not confirmed clearly, the pipe is not aligned naturally, the clamp is not matched properly, or the exhaust system already carries stress, the new flex pipe may still fail early after installation. For your order, the key is not only whether the part can be installed, but whether it can keep a stable seal, reduce rework, and make future replenishment easier to manage.
The following checks are useful for repair replacement, regular replenishment, and mixed-size bulk orders. They can help reduce leakage, specification mix-ups, and unnecessary communication after shipment.
Quick Answer
To reduce leakage and rework after replacing an exhaust flex pipe, first check the damaged area, nearby pipe condition, installation space, pipe diameter, overall length, end style, and connection method. During installation, avoid placing the flex pipe under tension, twist, or side load.
If you are preparing a bulk replacement order or mixed-size replenishment, confirm the size list, matched clamps, packaging labels, and sample details in advance. This helps reduce mistakes during quotation, packing, warehouse handling, and installation.
Check the Exhaust System Condition Before Replacement
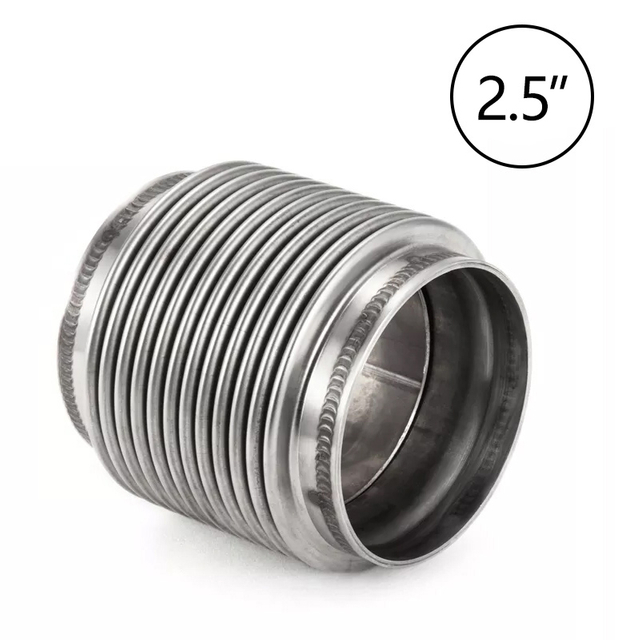
An exhaust flex pipe is used to absorb engine vibration, thermal movement, and small displacement in the exhaust system. When the braid becomes loose, the bellows section cracks, black soot appears around the joint, or the vehicle has obvious leakage and noise during operation, the part should be checked and may need replacement.
In real repair work, it is not enough to look only at the flex pipe itself. You also need to check whether the nearby exhaust pipe is deformed, whether the hangers or brackets are worn, whether the engine vibration is abnormal, and whether the pipe is sagging, shifted, or pulled out of its natural position.
If the exhaust system is already under stress, the new flex pipe will carry that stress after installation. Even when the product size is correct, early cracking, joint leakage, or abnormal noise may still appear.
For regular replacement parts and replenishment orders, this point matters. If the same installation position fails repeatedly, the cause may not be only the flex pipe quality. It may also be related to pipe stress, worn hangers, installation angle, or an unsuitable connection method.
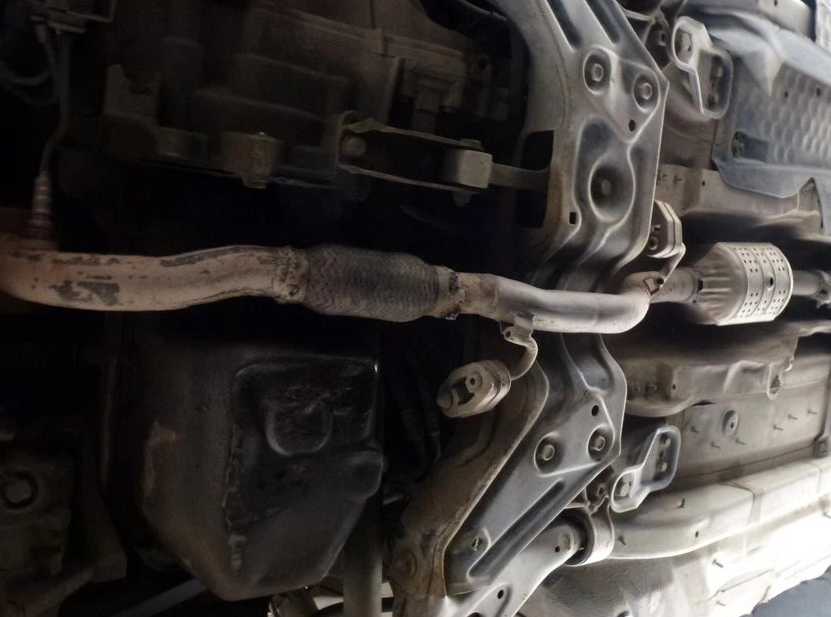
Tools and Materials Needed
To replace your exhaust flex pipe, gather the following tools and materials:
1. Wrenches or sockets (various sizes)
2. Reciprocating saw or cutting wheel
3. Jack and jack stands
4. Safety glasses and gloves
5. New exhaust flex pipe (preferably stainless steel flexible exhaust pipe)
6. welding gun or Exhaust clamps or couplings
7. Exhaust sealant
Confirm Basic Dimensions Before Cutting the Old Part
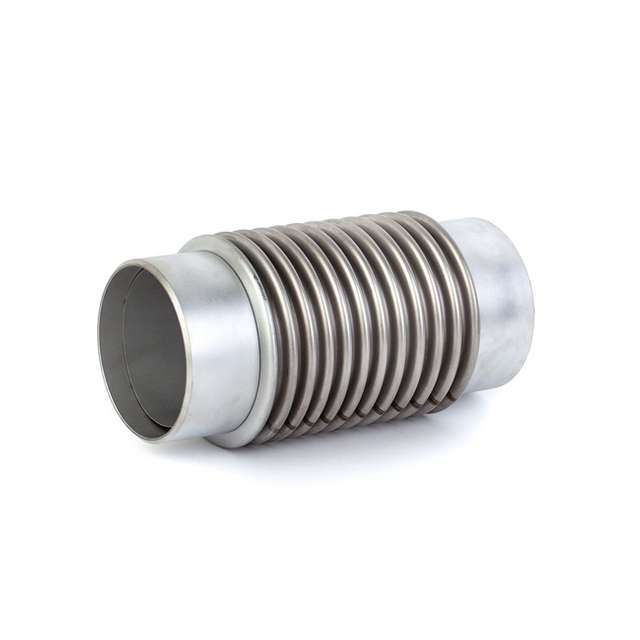
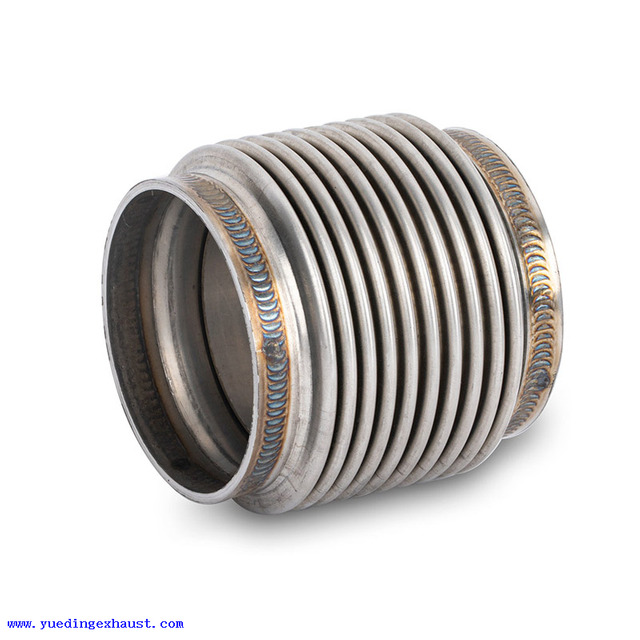
Before cutting out the old exhaust flex pipe, confirm the key dimensions of the replacement part. Common details include pipe diameter, overall length, flexible body length, neck length, end style, and available installation space.
Do not rely only on product photos or visual similarity. Many exhaust flex pipes look almost the same from the outside, but a small difference in total length, body length, neck length, or pipe diameter can affect insertion depth, clamp position, and final pipe alignment.
If you are preparing a regular replenishment order or a mixed-size order, it is better to organize a clear size list first. Separate common diameters, length combinations, quantities, packaging requirements, and whether matching clamps are needed. This makes quotation, packing, and shipment much smoother.
For sizes that look very similar, labeling and packaging separation are especially important. Otherwise, the product itself may be correct, but the wrong size can still be used during warehousing, picking, or installation, which may lead to rework and complaints.
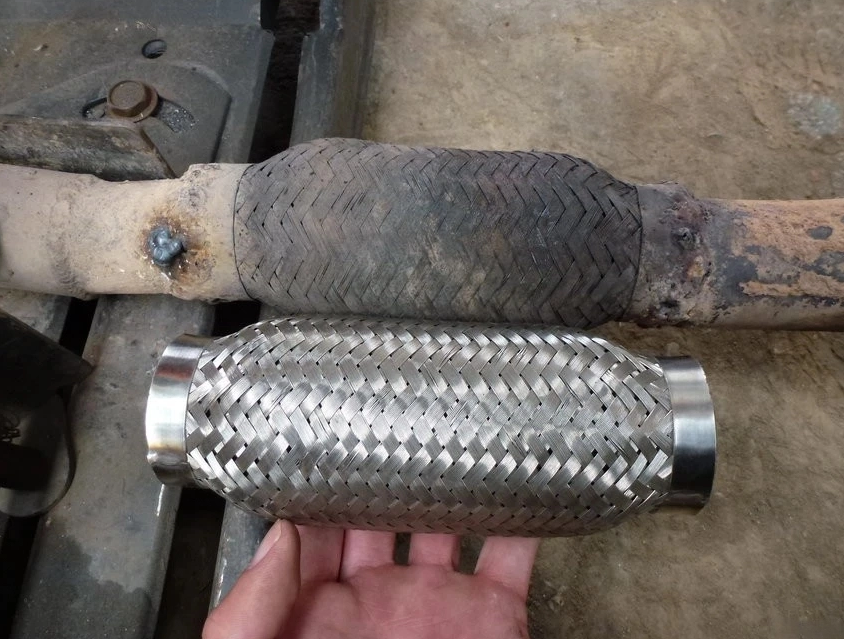
Choose the Connection Method Based on the Repair Condition
Common installation methods for exhaust flex pipes include weld-on installation and clamp-on connection. Both can be used for repair and replacement, but they are suitable for different conditions.
Weld-on installation is usually used when the pipe position is clear, a fixed connection is required, and proper repair equipment is available. Before welding, the pipe ends should be cleaned, aligned, and prepared according to the product structure.
If excessive heat is applied near the flexible section, or if the pipe is welded while it is not properly aligned, the risk of leakage, cracking, or later rework may increase. Some problems do not appear on the installation day. They may show up only after several heat cycles and vibration periods.
Clamp-on connection is suitable for some repair and quick replacement jobs, especially when welding is not convenient or future removal may be needed. When using clamps, pipe diameter, insertion depth, clamp width, and tightening position should be checked together.
If the exhaust flex pipe and clamp are supplied as matching parts, confirm the pipe size and clamp specification before shipment. For repair kits and mixed-size replacement orders, this can reduce the chance that your customers need to search for another matching component after receiving the goods.
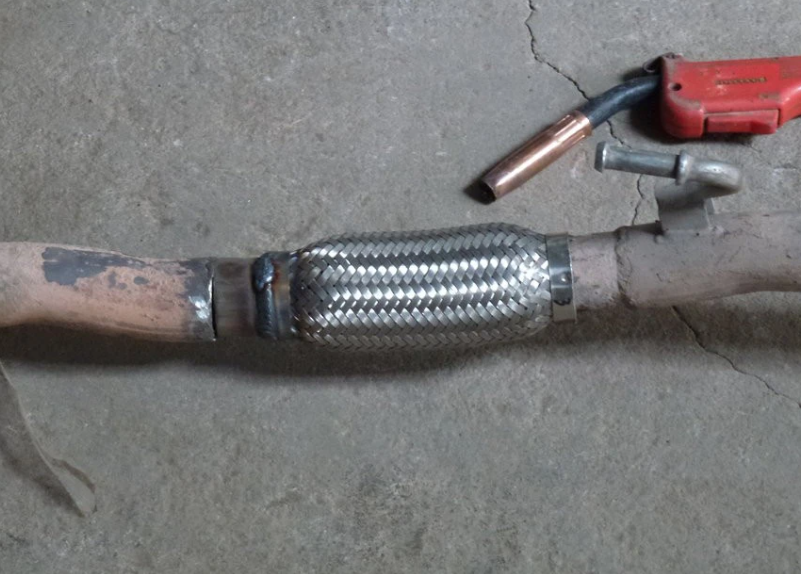
Installation Details That Often Lead to Rework
Problems after exhaust flex pipe replacement are often not caused by one single factor. In many cases, several small details—size, cutting position, pipe stress, and connection method—work together.
If the flex pipe is too short, it may remain stretched after installation. If it is too long, the exhaust pipe may touch the chassis or nearby components, causing noise or abnormal vibration. Incorrect length affects the natural compensation ability of the flex pipe and increases stress at the joint.
Incorrect pipe diameter is another common issue. If the fit is too loose, sealing may be unstable. If the fit is too tight, installation becomes difficult and the pipe end may deform. For clamp-on products, the pipe diameter and clamp size should be confirmed together.
Cutting position also affects installation stability. If the old pipe is cut too close to a bend, weld, or flexible section, there may not be enough clean pipe length for welding or clamp tightening. This makes later repair more difficult and the connection less stable.
An exhaust flex pipe should not be installed under twist, side load, or forced tension. It should stay in a natural position to absorb vibration and movement. If the pipe is pulled or compressed just to make the system align, the new part will carry extra stress from the beginning.
If you receive different feedback for the same type of product in different orders, do not judge the issue only by the product name. It is safer to recheck the installation position, connection method, pipe fit, flex pipe length, and whether matching clamps are required.
Check Sealing, Clearance, and Vibration After Installation
After the exhaust flex pipe is installed, do not only check whether the part is fixed in place. The joint seal, pipe clearance, hanger condition, and vibration behavior should also be reviewed.
During a cold start, observe whether there is visible leakage, abnormal noise, or excessive movement around the repair area. For welded connections, check the weld area carefully. For clamp-on connections, check whether the clamp is seated evenly, whether the pipe has shifted, and whether the tightening position is stable.
Safety should be considered during inspection. Do not place your hands close to hot exhaust parts, and do not keep the vehicle idling for a long time in an enclosed space. For workshop or repeated installation work, a professional leak check is more suitable.
After a short run and cooling period, it is also useful to check the clamp tightness and joint position again. Some looseness is not obvious immediately after installation, but may appear after heat expansion and contraction.
If leakage, black soot, strong exhaust smell, or abnormal vibration still appears after replacement, recheck the pipe diameter, alignment, hanger condition, clamp position, and connection method before assuming that the new product itself is the only problem.
Avoid Similar-Size Mix-Ups in Bulk Replacement Orders
For a single repair job, one confirmed size may be enough. For regular replacement supply, replenishment, and mixed-size orders, the bigger risk is often that similar sizes are mixed together.
Before placing a bulk order, it is helpful to confirm:
Common pipe diameter and length combinations;
Whether nipples, expanded ends, or flanges are needed;
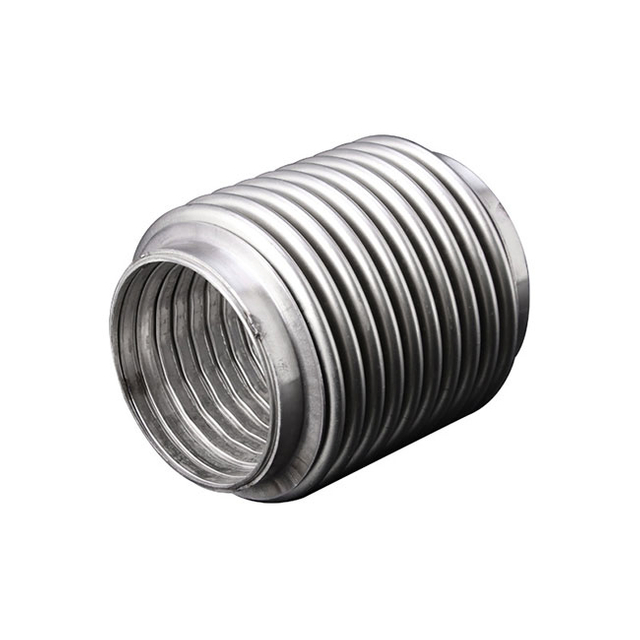
Whether an inner liner structure is required;
Whether matching exhaust clamps or connectors are needed;
Whether individual labels, SKUs, or model marks are required;
Whether cartons should be packed by size;
Whether samples should be confirmed before bulk shipment.
Exhaust flex pipes that look similar should not be mixed without clear identification. For warehouse, resale, and repair use, size labels, carton marks, and clean packing lists can reduce picking mistakes, installation errors, and customer complaints.
If your order mainly includes regular sizes, keeping a stable replenishment list is often more efficient. It makes quotation, preparation, and shipment easier, and it also supports long-term order management.
Basic Replacement Process for an Exhaust Flex Pipe
The following process can be used as a practical reference for repair replacement and regular replenishment content. The actual installation should still be checked according to the vehicle structure, pipe condition, and repair environment. Welding and vehicle lifting work should be handled by experienced technicians.
1. Prepare the Vehicle and Working Area
The vehicle should be parked on a flat surface, with the parking brake engaged and the wheels secured. After lifting the vehicle, use proper support equipment to keep the underbody working area stable and safe.
Before removing any part, check the overall condition of the exhaust system, including pipe routing, hanger position, nearby brackets, and visible rust, deformation, or sagging around the old flex pipe. For older vehicles, heavy-duty applications, or vehicles used in wet or dusty conditions, surrounding components may also be worn. The inspection should not focus only on the flex pipe itself.
2. Locate and Inspect the Damaged Flex Pipe
The exhaust flex pipe is usually installed in a position where the exhaust system needs to absorb vibration and movement. During inspection, check whether the braid is loose, whether the bellows section is cracked, and whether black soot, burn marks, or leakage signs appear around the joint.
Some damage may not be fully visible from the outside, especially when the inner liner or joint area is affected. If the vehicle has unusual exhaust noise, exhaust smell in the cabin, soot around the connection, or increased vibration during operation, the flex pipe area should be checked more carefully.
For high-mileage vehicles, commercial vehicles, or repeated repair cases, it is also important to check whether the pipe is misaligned, the hangers are worn, or the system is under stress. Otherwise, the new flex pipe may still carry abnormal load after installation.
3. Remove the Old Flex Pipe
If the old flex pipe is welded, mark the cutting position first and try to keep enough clean and straight pipe length for the new installation. If the old flex pipe is clamped, loosen the clamps or coupling sleeves before removing the part.
Some older exhaust systems may be difficult to disassemble because of rust and repeated heat cycles. In this case, avoid forcing the flex pipe body. Depending on the structure, it may be better to remove a local pipe section for repair. During removal, also check whether gaskets, sleeves, clamps, and pipe ends are damaged, because old connection parts may still cause leakage after a new flex pipe is installed.
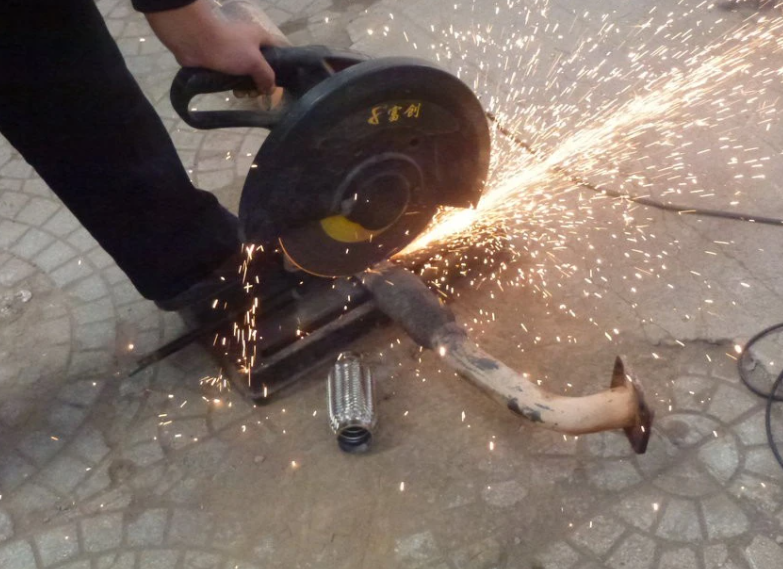
4. Prepare the New Flex Pipe
Before installation, confirm whether the new flex pipe matches the original position in pipe diameter, overall length, flexible body length, neck length, and end style. For regular repair replacement, common double-braid structures can meet many applications. For high-vibration, high-temperature, or stressed pipe systems, an inner liner or reinforced structure can be reviewed according to the actual condition.
A dry fit is recommended before final installation to check whether the new part can align naturally with the existing pipe. The cut pipe ends should be cleaned and deburred to remove rust, burrs, and contamination. This helps improve welding preparation, insertion depth, and clamp sealing.
For welded connections, the pipe ends should be prepared according to the product structure and repair condition. For clamp-on connections, insertion depth, clamp width, and tightening position should be checked before final assembly.
5. Install the New Flex Pipe
During installation, the new flex pipe should stay naturally aligned with the existing exhaust pipe. It should not be forced into position by stretching, compressing, or twisting the flexible section. An exhaust flex pipe is designed to absorb vibration and movement. If it is installed under obvious stress, cracking, leakage, or noise may appear earlier.
For welded installation, position the part first, then complete the weld according to the pipe end condition. Avoid applying excessive heat near the flexible section. For clamp-on installation, make sure the pipe end is inserted properly, the clamp is placed in the correct position, and the tightening force is applied evenly. This helps avoid uneven sealing, weak clamping, or pipe end damage.
If the flex pipe has extended necks, expanded ends, or matching connection parts, installation can be easier in some repair conditions. However, the pipe diameter, length, and connection method still need to match the actual exhaust pipe.
6. Inspect and Test After Installation
After installation, check the overall exhaust alignment, hanger position, pipe clearance, and whether there is any interference around the flex pipe. During the initial test, observe whether there is leakage, abnormal noise, or excessive vibration around the joint area.
Safety should be considered during leak checking. Do not place your hands close to hot exhaust parts, and do not keep the vehicle idling for a long time in an enclosed space. For workshop repair or repeated installation work, suitable professional leak detection methods are recommended.
After a short run and cooling period, check the clamp tightness, welded area, and joint position again. Some looseness or sealing issues may appear only after heat expansion and contraction. The service life of an exhaust flex pipe depends on material, structure, installation angle, vehicle condition, vibration, corrosion, and maintenance, so regular inspection is more practical than relying on a fixed mileage claim.
How Yueding Supports Regular Replacement and Replenishment Needs
Yueding supplies stainless steel exhaust flex pipes, braided flex pipes, metal bellows assemblies, exhaust clamps, and related connection parts. These products are mainly used in automotive exhaust systems, industrial piping, repair replacement, and standard assembly applications.
For regular sizes, common replacement items, and mixed-size bulk orders, we can provide quotation support based on quantity, size combination, and packaging requirements. For non-standard structures or special requirements, you can first provide drawings, sample photos, or size lists, and we will review whether the product is suitable for production and supply.
Yueding operates a factory of over 20,000 square meters and is certified under ISO, IATF, and other international standards. Our facility is equipped with automated and semi-automated production equipment, covering tooling, stamping, welding, inspection, packaging, and warehousing processes to support stable production for standard products and bulk orders.
Conclusion
Replacing an exhaust flex pipe is not only about installing a new part. To reduce leakage, noise, early failure, and rework, the pipe condition and product dimensions should be checked before replacement, the connection method and stress condition should be controlled during installation, and sealing, clearance, and vibration should be reviewed after installation.
For regular replacement, replenishment, and mixed-size bulk orders, a clear size list, matching clamps, packaging labels, and sample confirmation can reduce communication, warehouse, and installation problems.
If you need regular exhaust flex pipes, replacement sizes, or related exhaust clamps, you can view our product range or send your size list, sample photos, and purchasing requirements. We will help review the suitable supply options according to your actual needs.
FAQ
If I only have old part photos, can I ask for a quotation first?
Yes, you can start the discussion with photos, but photos usually help identify only the general product type. They are not enough to confirm full quotation and production details.
To reduce mistakes, it is better to provide at least the pipe diameter, overall length, flexible body length, end style, and quantity. For bulk orders, a size list is more useful because it helps check whether available specifications can match your requirement.
Why can two similar exhaust flex pipes have different prices?
A similar appearance does not always mean the same structure or cost. Pipe diameter, overall length, braid layer, inner liner, neck style, material thickness, packaging method, and order quantity can all affect the price.
For bulk purchasing, it is not recommended to compare only by photos. A more reliable way is to confirm the key dimensions, structure, and connection method first, then compare whether the products are actually the same type.
Do repeat orders need sample confirmation every time?
If the specification, structure, packaging, and label requirements remain the same, repeat orders can usually follow the confirmed list. But if the size combination, connection method, material requirement, or packaging changes, sample confirmation or key dimension confirmation is still recommended.
This is not to add unnecessary steps. It helps avoid unwanted differences between previous and new batches.
Can exhaust flex pipes and clamps be supplied as repair kits?
This can be reviewed according to available specifications and order requirements. For repair replacement and matching product supply, providing exhaust flex pipes together with suitable clamps can reduce the need for customers to find additional components separately.
However, this type of combination should be confirmed in advance. Pipe diameter, neck length, clamp type, packaging method, and label requirements all affect whether the kit will work smoothly in actual use.
If the exact product is not shown on the website, does it mean it is not available?
Not necessarily. The products shown on the website are usually common items and representative categories. They may not cover every available size or structure.
If you have sample photos, a size list, or purchasing requirements, you can send them for review. For non-standard structures, we will first check whether they are suitable for production and supply before moving to quotation.
How should mixed-size orders be packed for warehouse or resale use?
It is better to pack by size and mark the outer cartons, inner bags, or labels with size, model, or SKU information. Clear identification is especially important for exhaust flex pipes that look similar.
This can reduce warehouse picking mistakes and make future replenishment easier. If you have fixed packaging or label requirements, they should be confirmed before the order is arranged.


About Yueding
YUEDING manufactures stainless steel exhaust flexible connectors, clamps, metal bellows, and selected automotive exhaust components under ISO and IATF quality systems. With in-house production, inspection, and packaging capabilities, we support bulk orders, standard-size inventory, and customized branding for global B2B customers.
Reliable Delivery
Stable production planning, standard-size inventory, and batch shipping support help make delivery more predictable.

Factory Direct
Production, inspection, and packaging are managed in-house, making communication, quality control, and customization more efficient.

Integrated Supply
We supply flex pipes, clamps, metal bellows, and selected exhaust components to support related purchasing needs from one manufacturer.

