Common Exhaust Flex Pipe Installation Mistakes and How to Avoid Them
Exhaust flex pipes are essential for preventing cracks and vibrations in your vehicle’s exhaust system. A proper installation ensures better performance and fewer repairs. However, common installation mistakes can lead to costly issues like leaks and premature wear.
In this article, we’ll explore the most frequent mistakes during exhaust flex pipe installation and how to avoid them. Whether you're a DIYer or a professional, these tips will help you achieve a smoother, longer-lasting installation.
Key Takeaways
● Correct Sizing is Crucial: Ensure the exhaust flex pipe fits perfectly with your exhaust system to avoid leaks and performance issues.
● Quality Matters: Using high-quality materials for the exhaust flex pipe prevents premature wear and ensures durability over time.
● Proper Installation is Key: Proper alignment, torque, and cleaning of the exhaust system are essential for a secure connection and optimal performance.
● Regular Leak Testing: Always check for leaks post-installation to prevent exhaust gas leaks and potential engine inefficiency.
● Flexibility is Important: Ensure that the exhaust flex pipe has enough room to absorb system movement, preventing stress fractures and damage.
Understanding the Exhaust Flex Pipe
What Is an Exhaust Flex Pipe?
An exhaust flex pipe is a flexible section of tubing in the exhaust system designed to absorb vibrations, reducing the risk of cracks and damage. It allows for slight movements and adjustments in the exhaust system without compromising its integrity.
The flexibility of these pipes is especially important in vehicles with modified exhaust systems or those that experience frequent temperature changes. Without an exhaust flex pipe, the constant stress and vibration could cause cracks or even complete system failure.
Key Components of a Flex Pipe
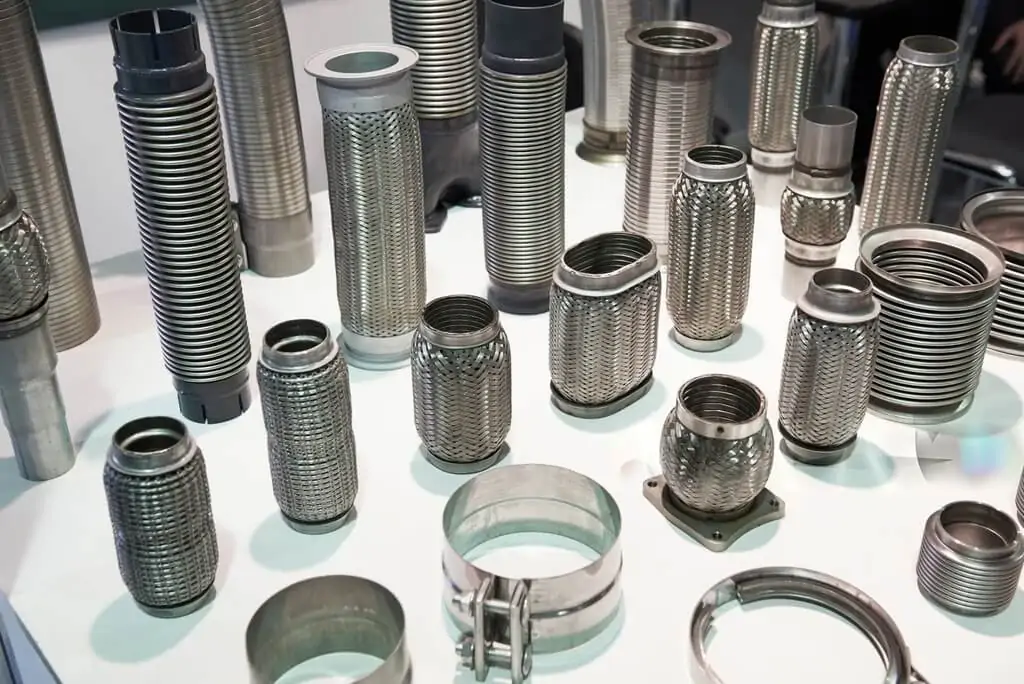
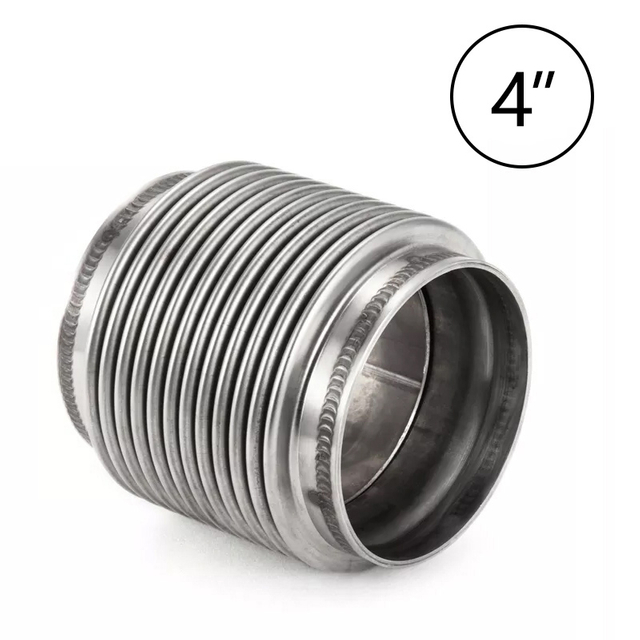
Exhaust flex pipes are made from durable materials such as stainless steel or braided metal, which provide both strength and flexibility. They typically consist of three main components:
1. Inner Tube: The main conduit for exhaust gases, often reinforced for strength.
2. Braided Sleeve: A flexible, woven metal layer that provides additional strength and prevents damage from external pressure.
3. End Fittings: The parts that connect the flex pipe to the exhaust system, typically designed for secure and leak-proof connections.
These components work together to prevent damage caused by engine movement, road vibrations, and temperature changes.
How Exhaust Flex Pipes Impact Vehicle Performance
A properly installed exhaust flex pipe significantly reduces the noise and vibrations produced by the exhaust system. By absorbing movement and temperature-induced expansion, it helps maintain the stability of other exhaust components, such as the manifold and catalytic converter.
The result is a quieter, smoother ride with fewer vibrations transmitted into the vehicle’s cabin. Additionally, by preventing stress fractures in the exhaust system, a flex pipe can extend the lifespan of the system as a whole.
Mistake 1: Incorrect Sizing of the Exhaust Flex Pipe
Why Size Matters
Choosing the correct size of exhaust flex pipe is crucial for ensuring a proper fit. An ill-fitting flex pipe can lead to exhaust leaks, poor performance, and eventual system failure. The size of the flex pipe needs to match the diameter of the exhaust pipe at both ends to create a secure and tight seal.
Using a pipe that's too small or too large will affect the exhaust flow and could even cause damage over time. A correctly sized flex pipe ensures smooth exhaust flow and maintains the overall efficiency of your vehicle’s system.
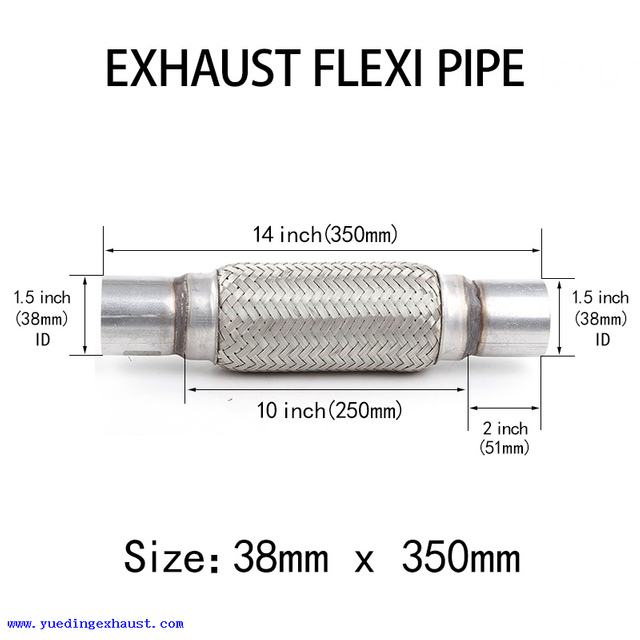
How to Measure for a Proper Fit
To measure for the right size flex pipe, follow these steps:
1. Measure the Exhaust Pipe Diameter: Use a caliper or measuring tape to measure the inner diameter of the exhaust pipe where the flex pipe will be connected.
2. Check the Length: Measure the space available for the flex pipe. Make sure the flex pipe is long enough to accommodate the required movement but not so long that it causes excess slack.
3. Check for Existing Fittings: Ensure that the flex pipe fits the connection points of the exhaust system securely.
By ensuring the flex pipe matches the size of the exhaust system, you’ll reduce the risk of leaks and ensure a proper fit.
The Consequences of Using the Wrong Size
Using the wrong size exhaust flex pipe can cause:
● Exhaust Leaks: An improper fit leads to gaps where exhaust gases can escape, reducing vehicle performance and increasing emissions.
● Poor Performance: A mismatch in size can disrupt the flow of exhaust gases, leading to decreased engine efficiency and performance.
● Early Wear: A poorly fitted flex pipe is more likely to be stressed, leading to premature wear and potential failure.
Tip: Always double-check the diameter and length before purchasing your flex pipe to avoid these issues.
Mistake 2: Using Low-Quality Exhaust Flex Pipe Materials
The Risks of Cheap Materials
When it comes to exhaust flex pipes, using cheap, low-quality materials can lead to costly repairs. Inferior materials such as low-grade stainless steel or unbraided pipes may be more susceptible to corrosion, wear, and fatigue. These materials may not withstand the constant temperature fluctuations and vibrations of your exhaust system.
Poor-quality flex pipes can degrade quickly, leading to exhaust leaks, loss of vehicle performance, and even complete failure of the exhaust system.
Identifying Quality Flex Pipes
To identify a quality exhaust flex pipe, look for:
● Material Quality: Choose pipes made from high-grade stainless steel or braided metal, which offer resistance to heat, corrosion, and wear.
● Reinforced Braiding: Ensure the flex pipe has a strong, durable braided outer layer that provides extra protection against external pressures and vibrations.
● Manufacturer Reputation: Purchase flex pipes from well-known, reputable manufacturers to ensure quality and reliability.
Cost vs. Durability
While cheap flex pipes may save you money upfront, they often don’t last as long and may require more frequent replacements. Investing in a high-quality flex pipe ensures long-term durability and performance, making it a worthwhile investment in the long run.
Note: Don’t compromise on material quality when it comes to exhaust flex pipes; a little extra cost upfront can save you from expensive repairs down the line.
Mistake 3: Not Preparing the Exhaust Pipe Properly Before Installation
Cleaning the Pipe for a Secure Connection
Before installing the exhaust flex pipe, ensure both ends of the exhaust pipe are clean and free of debris, rust, or old sealant. A clean surface allows the flex pipe to create a secure, tight seal and prevents leaks. Use a wire brush or sandpaper to remove any buildup.
The Role of Proper Alignment
Aligning the flex pipe correctly with the exhaust system is essential to prevent stress and strain on the exhaust system. Misalignment can cause premature wear or damage to the flex pipe and other components of the exhaust system.
Common Errors During Preparation
● Neglecting Rust: Failing to remove rust can compromise the integrity of the exhaust system, leading to leaks.
● Inadequate Sealing: Not using proper sealant or gaskets can result in exhaust gas leakage.
● Ignoring Alignment: Poor alignment can cause stress on the flex pipe, leading to failure.
Tip: Always thoroughly clean and align your exhaust components before installation for a secure fit and to minimize wear.
Mistake 4: Incorrectly Tightening the Flex Pipe
Why Torque Specifications Matter
Following manufacturer torque specifications is crucial to avoid damaging the exhaust flex pipe. Too much torque can damage the pipe or cause it to crack, while too little torque may leave the connection too loose, resulting in leaks.
How to Properly Tighten the Exhaust Flex Pipe
To tighten the exhaust flex pipe properly:
1. Use a Torque Wrench: Always use a torque wrench to ensure the correct amount of torque is applied.
2. Follow Manufacturer Instructions: Check the manufacturer’s guidelines for the recommended torque settings.
3. Tighten Evenly: Tighten the nuts evenly on both sides of the pipe to ensure a secure, uniform fit.
Consequences of Over-tightening and Under-tightening
● Over-tightening can damage the flex pipe or cause it to crack, compromising its flexibility and function.
● Under-tightening may leave the connection too loose, leading to exhaust leaks and reduced system performance.
Tip: Always use the proper torque settings to avoid these issues and ensure a secure, leak-proof installation.
Mistake 5: Failing to Check for Leaks Post-Installation
The Importance of Leak Testing
Once the exhaust flex pipe is installed, testing for leaks is essential to ensure the integrity of the installation. Leaks can lead to decreased engine performance, increased emissions, and potential damage to other exhaust system components.
How to Check for Exhaust Leaks
● Visual Inspection: Look for signs of exhaust gas or soot around the flex pipe connections.
● Soapy Water Test: Apply a soapy water solution to the flex pipe joints and look for bubbles, which indicate leaks.
● Smoke Test: Introduce smoke into the exhaust system and check for escaping smoke around the connections.
Signs That Your Exhaust Flex Pipe Needs Replacing
If you notice any of the following, your flex pipe may need replacement:
● Excessive Noise: Increased exhaust noise can indicate a leak in the system.
● Visible Damage: Cracks, holes, or signs of wear on the flex pipe suggest it’s time for a replacement.
● Vibration or Rough Ride: If the vehicle experiences more vibrations than usual, the flex pipe may no longer be absorbing shocks effectively.
Note: Regular leak checks post-installation can prevent long-term damage and ensure the longevity of your exhaust system.
Mistake 6: Not Accounting for Exhaust System Vibration and Movement
Understanding Exhaust System Movement
The exhaust system constantly expands and contracts due to temperature changes, engine movements, and road vibrations. A flex pipe is designed to absorb these movements, allowing the exhaust system to function smoothly without causing stress on other components.
How to Ensure Proper Flexibility
Ensure the flex pipe has enough room to move with the system’s expansion and contraction. Proper installation includes securing the flex pipe without making it too tight, allowing for natural movement. Also, ensure there’s enough clearance for the flex pipe to expand and contract without restrictions.
Potential Problems from Inadequate Flexibility
If the flex pipe is too rigid or improperly installed, it can cause:
● Stress Fractures: The lack of movement can lead to cracks in the exhaust system.
● Leaks: Rigid connections increase the likelihood of leaks from stress or improper fit.
Tip: Always ensure flexibility when installing your exhaust flex pipe to allow for natural expansion and contraction.
Conclusion
Installing an exhaust flex pipe may seem straightforward, but avoiding common mistakes is crucial for optimal exhaust system performance. By carefully considering sizing, material quality, alignment, and torque, you can prevent leaks, premature wear, and poor performance.
Investing in a high-quality exhaust flex pipe and using proper installation techniques will save both time and money, ensuring long-lasting results. Regularly checking your exhaust system for leaks and other issues helps maintain your flex pipe’s effectiveness.
Yuedingexhaust offers high-quality exhaust flex pipes designed to provide durable performance and value, making it easier to achieve a successful, long-lasting installation.
FAQS
Q: What is an exhaust flex pipe and why is it important?
A: An exhaust flex pipe is a flexible section of tubing in your vehicle's exhaust system that absorbs vibrations, preventing cracks and damage. It's crucial for maintaining smooth vehicle performance and reducing stress on other exhaust components.
Q: How can I avoid incorrect sizing when installing an exhaust flex pipe?
A: To avoid incorrect sizing, carefully measure the diameter and length of the exhaust pipe and match the flex pipe size accordingly. Using the right size ensures a secure fit, preventing leaks and performance issues.
Q: What are the risks of using a low-quality exhaust flex pipe?
A: Low-quality exhaust flex pipes can degrade quickly, leading to leaks, premature wear, and system failure. Investing in high-quality materials ensures durability and extends the lifespan of your exhaust system.
Q: Why is it important to check for leaks after installing the exhaust flex pipe?
A: Checking for leaks after installation is essential to ensure there are no gaps in the exhaust system. Leaks can reduce engine efficiency, cause excessive noise, and lead to costly repairs down the line.
Q: How does improper alignment affect the exhaust flex pipe installation?
A: Improper alignment can put unnecessary stress on the exhaust flex pipe, leading to premature wear or even failure. Proper alignment ensures the flex pipe functions as intended, absorbing vibrations without causing damage.


About Yueding
YUEDING manufactures stainless steel exhaust flexible connectors, clamps, metal bellows, and selected automotive exhaust components under ISO and IATF quality systems. With in-house production, inspection, and packaging capabilities, we support bulk orders, standard-size inventory, and customized branding for global B2B customers.
Reliable Delivery
Stable production planning, standard-size inventory, and batch shipping support help make delivery more predictable.

Factory Direct
Production, inspection, and packaging are managed in-house, making communication, quality control, and customization more efficient.

Integrated Supply
We supply flex pipes, clamps, metal bellows, and selected exhaust components to support related purchasing needs from one manufacturer.

