How Tight Should Exhaust Clamps Be?
How tight should your exhaust clamps really be? Finding that perfect "Goldilocks" seal is a constant struggle for many mechanics. Guessing the torque risks permanent pipe damage or dangerous leaks. In this guide, you will learn the exact specifications to ensure a safe, professional installation.
Key Takeaways
● Optimal Torque Range: Most standard Exhaust Clamp applications require a torque between 40 to 60 lb-ft to ensure a secure, leak-proof seal.
● Precision Tools Matter: Always use a calibrated torque wrench instead of guessing to prevent crushing the exhaust tubing or snapping the bolts.
● Avoid Over-tightening: Applying excessive force creates permanent "crush zones" in the metal, making future maintenance or disassembly nearly impossible.
● Heat Cycle Re-check: Metals expand when hot; always re-tighten your Exhaust Clamp after the system has reached operating temperature and cooled back down.
● Monitor for Leaks: Watch for audible ticking sounds or visual soot trails, as these are clear indicators of an under-tightened or failing Exhaust Clamp.
● Select the Right Hardware: Choose between U-bolt, band, or V-band clamps based on your specific joint type and the need for future reusability.

Determining the Ideal Torque: How Tight Should Exhaust Clamps Be?
Identifying the exact torque for exhaust clamps starts with the manufacturer's service manual. Every vehicle and aftermarket system has specific tolerances based on engineered metallurgy. While general rules exist, they cannot replace official specifications for high-performance or heavy-duty industrial applications.
For most standard automotive applications, the industry-standard torque range falls between 40 to 60 lb-ft (54 to 81 Nm). This pressure typically provides enough clamping force to bridge the gap between overlapping pipes without crushing them. However, this varies significantly by hardware type. U-bolt clamps often require the higher end of this range to create a "crush seal," while heavy-duty band clamps might require specialized settings to distribute pressure evenly.
The grade of the bolt also dictates the limit. A Grade 8 bolt can handle significantly more tension than a Grade 5 bolt. Using a calibrated torque wrench is non-negotiable; it is the only way to ensure precision. Without it, you risk uneven loading. A visual "sweet spot" often appears when the clamp bracket fully seats against the pipe surface, but professional measurement remains the only way to guarantee a long-term seal.
Clamp Type | Typical Torque Range (lb-ft) | Common Application |
Standard U-Bolt | 40 - 55 | General repair, budget systems |
Lap Joint Band Clamp | 45 - 60 | Overlapping slip joints |
Butt Joint Band Clamp | 40 - 50 | Flush-mounted pipe ends |
V-Band Clamp | 10 - 15 (Check Spec) | Turbochargers, high-end racing |
Tip: Always verify if your torque wrench is calibrated in lb-ft or lb-in to avoid catastrophic over-tightening.
Note: Stainless steel hardware is prone to "galling" or seizing, so torque readings may be inaccurate without proper lubrication.
Factors Influencing the Tightness of Different Exhaust Clamps
Metal composition dictates how a joint reacts to pressure. Stainless steel is harder and less prone to corrosion, but it requires precise clamping because it doesn't "give" as easily as aluminized steel. If the material is thin-walled, lower torque is necessary to prevent the pipe from collapsing inward.
Pipe diameter plays a massive role in distribution. A 5-inch industrial exhaust pipe has more surface area than a 2-inch passenger car pipe. Consequently, larger exhaust clamps need more force to achieve a uniform 360-degree seal. Additionally, engineers must account for heat expansion. Engines operating at high temperatures cause metal to expand significantly; a clamp that is too tight when cold might snap or warp the pipe as the system reaches operating temperature.
Working with reused hardware introduces variables like rust and thread fatigue. Corroded threads increase friction, which "tricks" torque wrenches into clicking before the clamp is actually tight. In these cases, cleaning the threads or replacing the hardware is safer than simply increasing the torque.
The Risks of Over-Tightening Your Exhaust Clamps
Over-tightening is a frequent mistake in DIY and professional shops alike. When you apply excessive force, the clamp creates "crush zones." These indentations deform the pipe, making it nearly impossible to slide the pipes apart during future maintenance. This often necessitates cutting the pipe and replacing entire sections rather than just the clamp.
Beyond pipe damage, the hardware itself can fail. Stripped threads or snapped bolts are common outcomes of over-stressing exhaust clamps. Even if the bolt stays intact, the inward bulging of the pipe wall creates internal turbulence. This disruption in exhaust flow can lead to increased backpressure, slightly reducing fuel efficiency and engine performance.
Long-term durability also suffers. Metal under extreme, constant tension is more susceptible to stress fractures. Over time, the vibration of the vehicle combined with the excessive clamping load can cause the pipe to crack at the joint, leading to a total system failure.
Note: A "crushed" joint is the leading cause of labor-intensive exhaust removals, often doubling the time required for simple muffler replacements.
Identifying Signs of Loose or Under-Tightened Exhaust Clamps
A loose connection is usually easy to diagnose if you know what to listen for. A sharp "ticking" or "puffing" sound, especially during cold starts, indicates air escaping through a gap. As the metal expands with heat, these gaps sometimes close, but the underlying issue remains.
Visual cues are equally telling. Look for carbon soot buildup—black, powdery trails radiating from the joint. This is a definitive sign of a leak. If you notice physical vibration or a metallic rattling sound, the clamping force is likely insufficient to hold the weight of the exhaust components, leading to hardware fatigue.
Ignoring these signs affects vehicle electronics. Modern systems rely on oxygen sensors to manage fuel-to-air ratios. If air enters a loose joint near a sensor, it creates "lean" readings, triggering check engine lights and causing the engine to run inefficiently.
Tip: Use a soapy water solution in a spray bottle on a cold exhaust joint; bubbles will form immediately if the clamp is under-tightened.
Selecting the Right Exhaust Clamps for Your Specific Joint
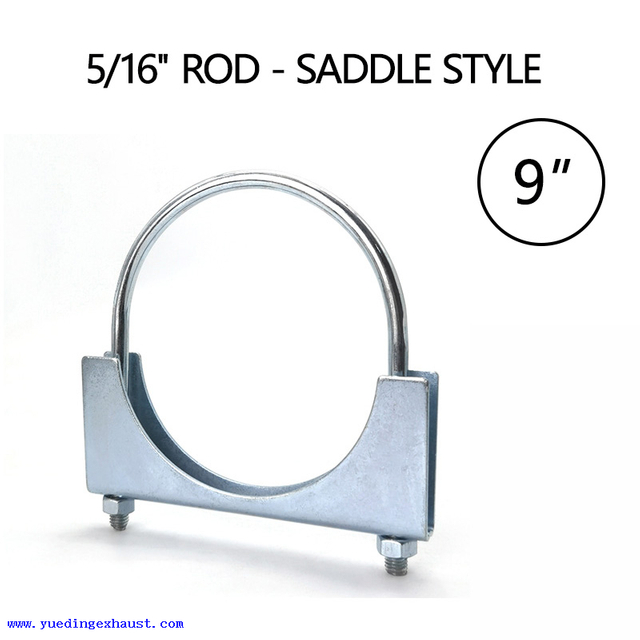
Choosing the correct hardware is half the battle. U-bolt clamps (saddle clamps) are inexpensive and effective but create a permanent crimp in the pipe. They are best for permanent, budget-friendly repairs where disassembly isn't expected.
Band clamps offer a more sophisticated solution. Lap joint clamps are designed for pipes that slide over one another, providing a wide surface area for the seal. Butt joint clamps connect two pipes of the same diameter that sit flush against each other. Both types distribute pressure more evenly than U-bolts, reducing the risk of deformation.
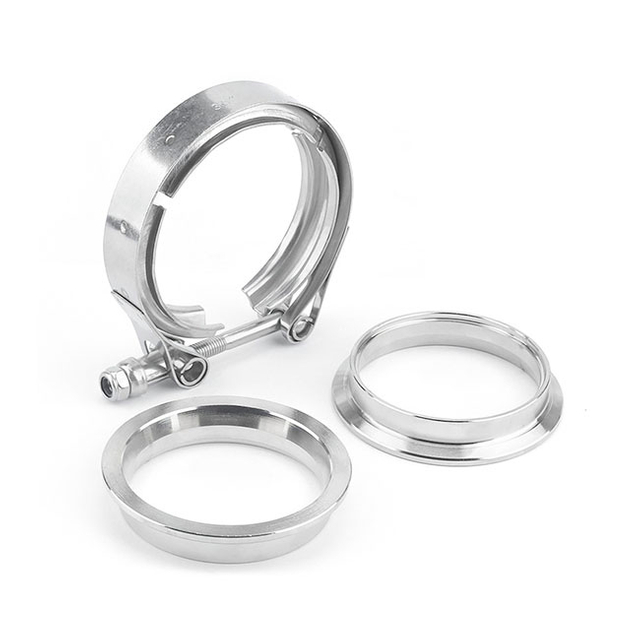
For high-performance or heavy-duty turbo applications, V-band clamps are the gold standard. They use a flange system that provides a superior seal with relatively low torque requirements. Regardless of the clamp type, using exhaust paste or assembly lube can help fill microscopic imperfections in the metal, ensuring a 100% leak-free finish even at lower torque settings.
Clamp Type | Best For | Reuseability |
U-Bolt | Permanent, low-cost repairs | Low (damages pipe) |
Band Clamp | Professional exhaust builds | High |
V-Band | Turbochargers & frequent removal | Excellent |
Note: V-band clamps are highly sensitive to over-tightening; exceeding 15 lb-ft can warp the precision-machined flanges.
Best Practices for Installing and Re-Torquing Exhaust Clamps
Proper installation requires a systematic approach. When tightening clamps with multiple bolts, use a "cross-pattern" or alternate between nuts. This ensures the clamp pulls down evenly across the pipe diameter, preventing the hardware from cocking to one side and creating a "half-moon" leak.
The "heat cycle" is a critical but often skipped step. Metal moves as it heats and cools. After installing new exhaust clamps, run the engine until it reaches operating temperature, then let it cool completely. Re-check the torque; you will often find that the hardware has settled and requires a slight adjustment to maintain the original spec.
Finally, preparation is key. Use a wire brush to remove rust, scale, and old sealant from the mating surfaces. If the clamp is gripping grime instead of metal, it will eventually loosen as the grime burns off. Applying a small amount of high-temperature anti-seize to the threads ensures smooth tightening and accurate torque readings.
Note: Never reuse a U-bolt clamp that has already been crushed; the metal has lost its structural integrity and will not seal effectively a second time.
Conclusion
Finding the right tension for exhaust clamps prevents leaks and protects your system from permanent damage. Stick to the 40 to 60 lb-ft range while prioritizing a torque wrench over guesswork. For high-quality sealing solutions, yuedingexhaust provides durable components designed for precision and long-term efficiency. Regular inspections and a post-heat cycle check ensure your hardware remains secure for years.
FAQS
Q: What is the standard torque for an Exhaust Clamp?
A: Most exhaust clamp types require 40 to 60 lb-ft to ensure a leak-free seal.
Q: Why is a torque wrench necessary for an Exhaust Clamp?
A: It prevents over-tightening, which can crush pipes or snap the exhaust clamp bolts.
Q: How do I know if my Exhaust Clamp is too loose?
A: Look for black soot trails or listen for a ticking sound around the exhaust clamp joint.
Q: Can I reuse a U-bolt Exhaust Clamp?
A: No, these exhaust clamps permanently deform the pipe and lose structural integrity after one use.


About Yueding
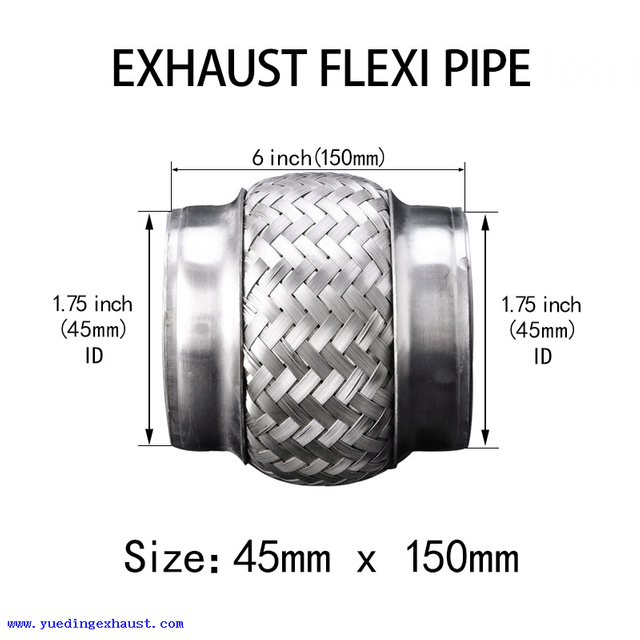
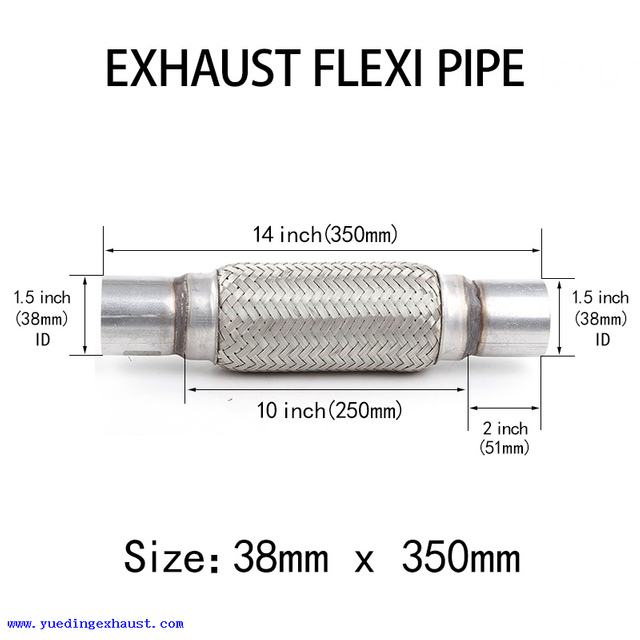
YUEDING manufactures stainless steel exhaust flexible connectors, clamps, metal bellows, and selected automotive exhaust components under ISO and IATF quality systems. With in-house production, inspection, and packaging capabilities, we support bulk orders, standard-size inventory, and customized branding for global B2B customers.
Reliable Delivery
Stable production planning, standard-size inventory, and batch shipping support help make delivery more predictable.

Factory Direct
Production, inspection, and packaging are managed in-house, making communication, quality control, and customization more efficient.

Integrated Supply
We supply flex pipes, clamps, metal bellows, and selected exhaust components to support related purchasing needs from one manufacturer.

